Check out our Complete Guide to Yoga for Busy Mums, with poses for all common issues Moms face, from postpartum weight gain to posture issues to stress.
There is nothing as rewarding as being a mother – and nothing as tiring as well! Saying a Mom is busy is a bit of a redundancy – what Mom isn’t busy?
However, since Moms are always so busy caring for others, she often ends up with little to no time to care for herself. Soon enough, she is plagued with various aches and pains along with other issues like dull skin or falling hair. A new Mom has multiple other challenges as well, as her body takes time to go back to its non-pregnant state.
You could find different remedies for your various issues, but there is one answer that can solve most of them, if not all, at once.
It’s yoga!
Yoga is an excellent tool for connecting with yourself, which is what Moms need first and foremost. It helps you become aware of your body in a more intimate way, and you understand your strengths and weaknesses in ways you hadn’t earlier. It strengthens and relaxes, it rejuvenates and heals, it connects and isolates.
There are many ways yoga helps Moms, and today we have a complete guide to yoga for busy Moms to tackle common issues like postpartum wellness, weight loss, fatigue and others. All you need is a non-slippery, cushioned yoga mat. If you’re a beginner to yoga or are just recovering from childbirth or an injury, you may also like a blanket, a yoga strap and a couple of yoga blocks. These will help you get a deeper stretch without causing pain or injury.
Complete Guide to Yoga for Busy Mums
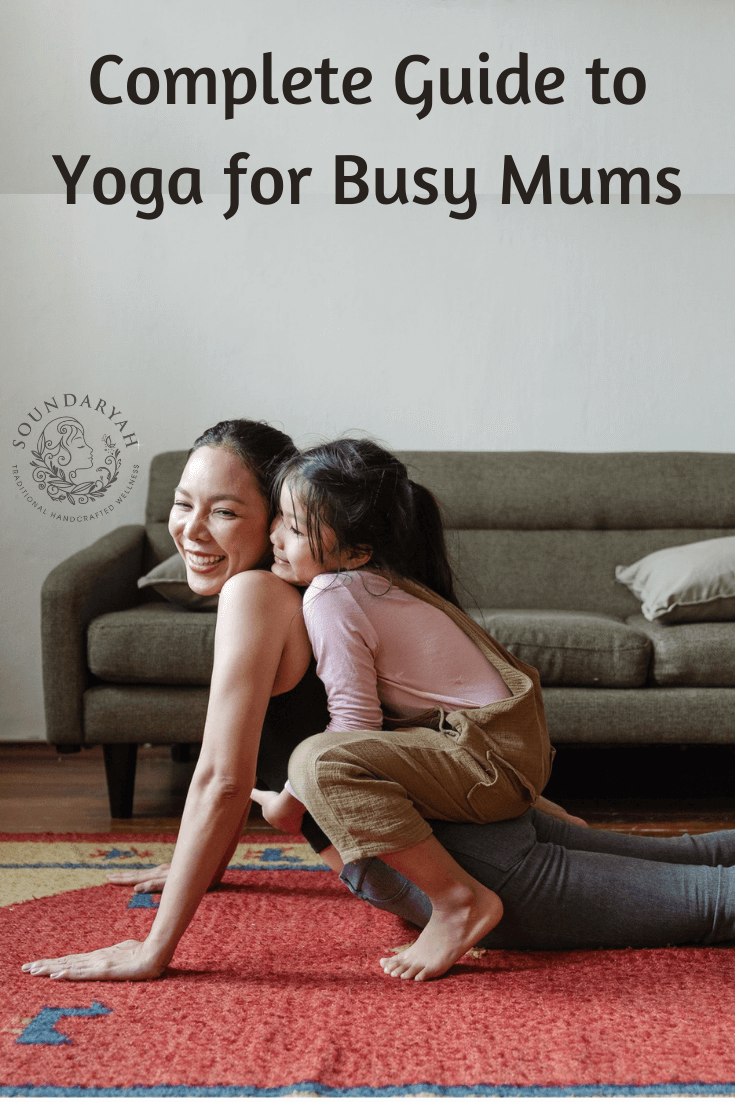
Yoga for Postpartum Uterine Health
Childbirth is a natural process, but it is incredibly taxing to the human body, which has been preparing nine months for this event. As a result, the body needs time to recover from these changes and a new Mom needs lots of rest. Once the doctor gives the go ahead for exercise, you can start on these simple yoga poses that’ll give the reproductive organs a good massage and help them recover faster.
1. Setu Bandha Sarvangasana (Bridge Pose)
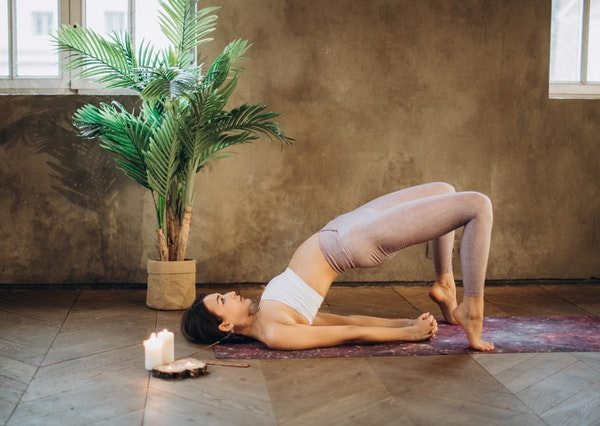
This pose is great for stretching out the spine, the legs as well as for opening up the shoulders and chest. It also relieves any pelvic discomfort and dissipates stress.
- Lie flat on your back with knees bent and feet flat on the floor, hip width apart. Keep arms by your sides.
- Exhaling, lift the buttocks off the floor, pressing into the arms and feet.
- Keep the thighs parallel to each other and to the floor, if possible. Extend knees away from the hips.
- Press the breast bone towards the chin. Spread out the shoulder blades.
- Hold for as long as is comfortable and release the spine to the floor
2. Balasana (Child’s Pose) with Kegels
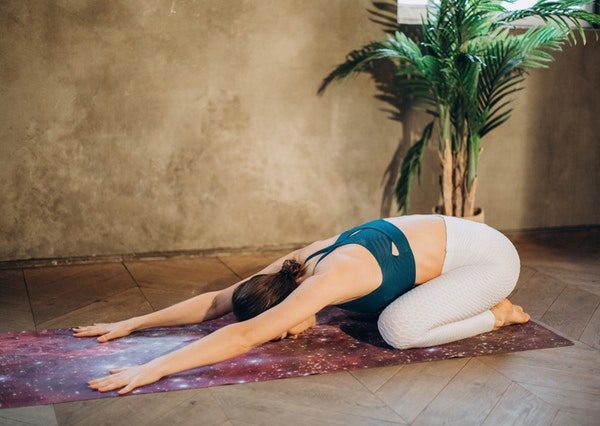
Balasana is a relaxing pose that also offers a great stretch for the hips and thighs. Here, we add a little extra to it – kegels. After delivery, many women suffer from a weak pelvic floor, and associate urinary incontinence. Kegels help fix that and it is easier to isolate the muscles needed for it in the course of the child’s pose. These are the muscles you usually hold when you need to pee and the bathroom is not available.
- Kneel on the floor with big toes touching. Sit on the heels with knees as wide as the hips.
- Exhale and bend forward towards your thighs, folding from the hip joint. Lengthen the spine and the neck as you bring your forehead to the floor.
- Extend both arms forward with palms on the floor. While here, squeeze the pelvic floor muscles and hold it for five seconds and then release. Rest for 10 seconds and repeat at least five times. Increase gradually.
- Stay in the pose for as long as you want. To come up, inhale, extending the torso and then lift the upper body into starting position.
3. Baddha Konasana (Cobbler Pose)
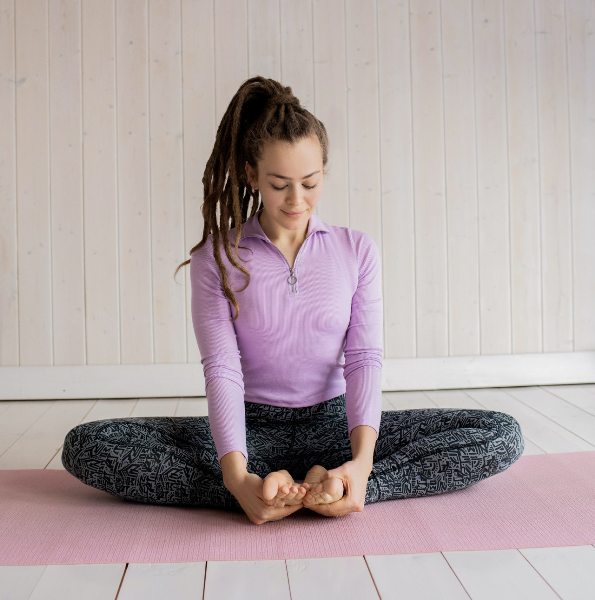
This is the top pose when it comes to improving reproductive health in women. The pose opens up the hips, inner thighs and groin, and also stimulates the reproductive organs along with the bladder and kidneys. It also helps with menstrual pain and discomfort.
- Sit with legs stretched out in front, keeping back straight. If necessary, sit on a blanket to keep the spine straight.
- Exhale and bend the knees, bringing the heels towards the groin and pressing the soles of the feet together.
- Bring the heels as close to the groin as is comfortable, keeping the edges of the feet on the floor and grasping both big toes with the hands.
- Lengthen the spine and try to release the tops of the thigh bones so that the knees fall towards the floor.
- Sit in this position for as long as is comfortable. Inhale, lift the knees and extend legs out in front.
Yoga for Healthy Skin
In general, yoga is considered beneficial for skin, since it reduces stress, which is the number one reason for most skin issues including premature ageing. However, there are some specific poses with extra benefits for skin.
4. Matsyasana (Fish Pose)
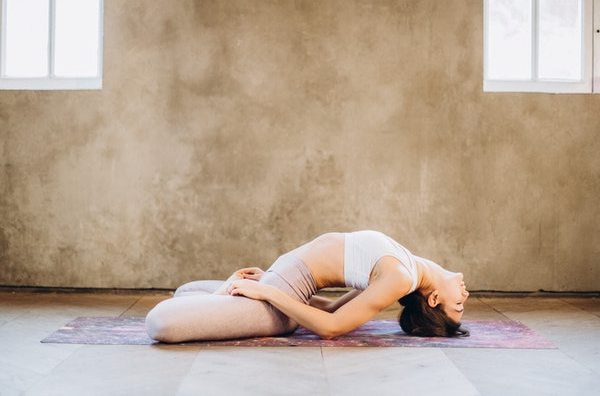
Doing the fish pose is one of the best things you can do for healthy skin. It directs more blood towards the face, making it healthier and nourishing the skin cells from within. It is also believed to tone the muscles of the neck and reduce the appearance of a double chin.
- Lie flat on the floor with the knees bent and feet flat on the floor. Keep the knees hip width apart.
- Lift the hips, pressing into the feet, and bring the hands under the hips, palms facing down.
- Lower the buttocks on to the back of the hands. Extend the legs one at a time, keeping the feet close to each other.
- Press down into the upper arm to lift the shoulder blades and upper body.
- Continue lifting the breast bone as high as you can go. Drop the head back, lowering the crown to the floor, keeping a natural curve in the neck and upper back.
- Keep the legs neutral and the bulk of the weight resting on the upper arms.
- Hold for a few breaths. To release, raise the head and then drop back to the floor.
5. Dhanurasana (Bow Pose)
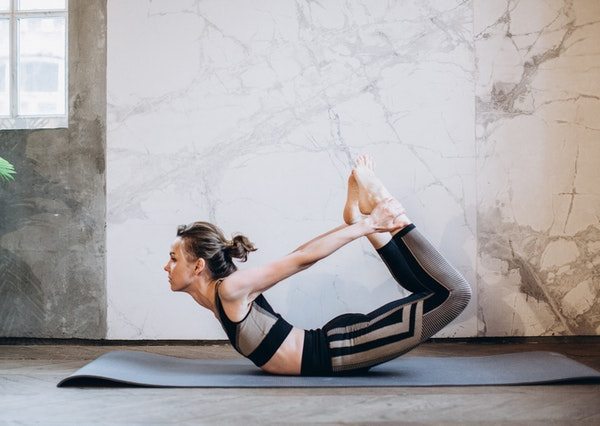
This pose is called the bow pose because it looks like an archer’s bow, strung and ready to go. This pose has many benefits but one of the most important ones is that it applies pressure on the abdomen, helping it flush out toxins. The detoxifying process ends up clearing your skin as well and brings out your inner glow.
- Lie flat on your stomach with your arms by your side, palms facing up.
- Exhaling, bend your knees and bring your feet as close to your buttocks as you can. Keep knees hip width apart.
- Lift the upper body slightly, extending the hands back to grab the ankles.
- Inhaling, lift the feet up and away from the buttocks, simultaneously lifting the thighs away from the floor. The upper body will also lift up.
- Open up the chest by squeezing the shoulder blades back and away from the ears.
- Hold the pose for 30 seconds, breathing all the while. To release, exhale and let go of the feet and lie back down.
6. Paschimottanasana (Seated Forward Bend)
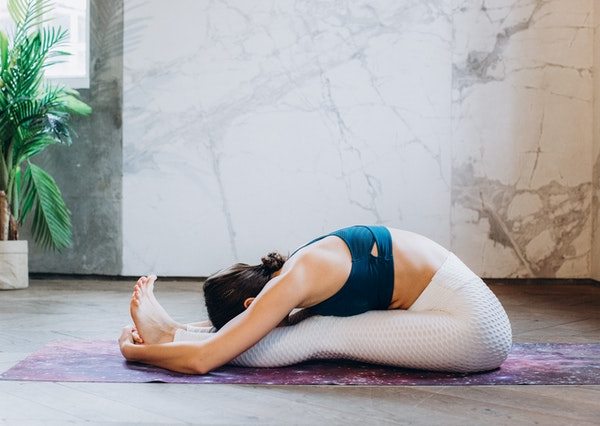
This pose is an excellent stretch for the whole body, especially the legs and the back. It’s also immensely relaxing, and helps purify the blood and improve skin tone by increasing blood flow to the face. This pose is also believed to improve digestion, which helps prevent acne and breakouts.
- Sit on a folded blanket with legs stretched out in front and heels grounded. Keep back straight and thighs pressed into the floor.
- Inhale and fold forward from the hip joint, keeping the back straight and long.
- Reach your arms forward and grab the outer edges of the feet. If you can’t reach your feet, use a strap, keeping elbows straight.
- Stretch deeper into the pose, keeping the back and neck straight. Let the belly lower onto the thighs, followed by the chest and finally the head.
- Hold the pose while breathing, for as long as you like. To release, lift the upper body and ground the pelvis, slowly coming to starting position.
Yoga for Healthy Hair
Just as yoga is helpful for healthy skin, it is great to promote hair growth, prevent hair fall and solve other hair issues. While yoga in general helps decreasing stress, which is the number one reason for hair fall, certain poses can provide other benefits as well.
7. Ustrasana (Camel Pose)
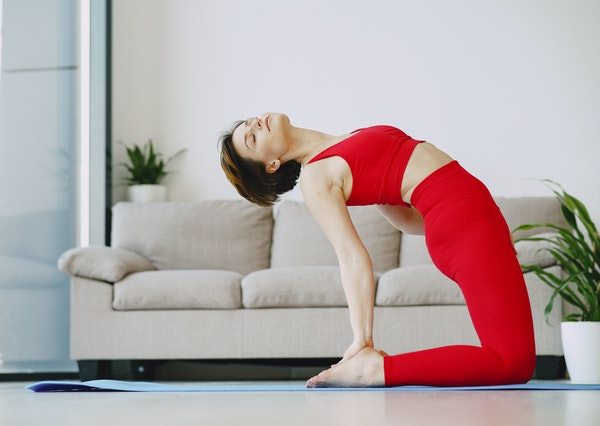
The camel pose really stretches out your back and opens up your chest and heart, making you feel good about yourself and everything that you do. It’s a great stress buster and confidence booster.
- Kneel down on the mat, pressing into the tops of the feet, extending toes back. Keep knees hip width apart and thighs perpendicular to the floor. Keep hips directly over knees.
- Inhale, straightening the spine, lengthening the back and neck.
- Exhale and extend the arms out to the side, palms facing forward.
- Reach the hands out to the heels. If you can’t reach the heels, use blocks. Ensure hips are over knees.
- Use the shoulder blades to lift up the chest, extending the upper back. Press down on the feet and lower legs to maintain balance.
- If you can, drop the head to the back. Hold the pose for as long as is comfortable. To release, inhale and bring the chest back up, followed by the head.
8. Uttanasana (Standing Forward Bend)
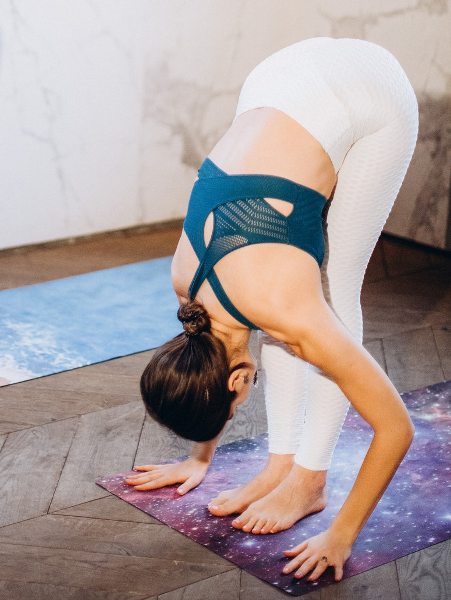
This standing pose gives a rush of blood to the face and the head making it a great pose for healthy skin and hair. It increases blood circulation in the scalp, which supplies nutrients and stimulates the follicles. This bend is also great for relieving stress and improving digestion.
- Stand in mountain pose, with back straight, feet grounded and head neutral.
- Place hands on hips and fold forward from the hip joint, consciously separating the ribs from the pelvis, keeping the back straight.
- Keep the torso long as you move down, keeping knees straight. Bring hands to the floor. If you can’t reach the floor, place blocks instead.
- Dig heels into the floor and try to lift the buttocks higher. Hold the pose for as long as you like, lengthening the spine with each breath. To release, bring hands to the hips and inhaling, bring the torso back up, pressing into the pelvis.
9. Adho Mukha Savasana (Downward Facing Dog Pose)
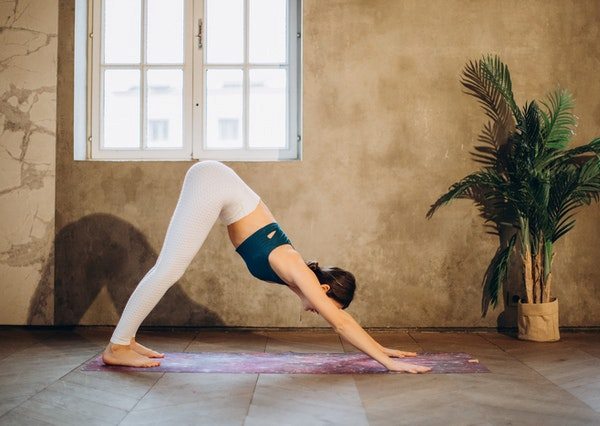
Similar to the forward bend, the downward facing dog is also an inverted position that drives blood and oxygen to the head. As with the previous pose, this one also does double duty, with immense benefits for the skin and hair, while also acting as a stress buster.
- Get down on the floor on your hands and knees in a table top position. Keep knees hip width apart and directly under the knees. Place hands under the shoulders, slightly ahead of the shoulders. Keep toes turned under.
- Exhaling, lift the knees, bringing the heels closer to the floor. Keep back straight, putting the bulk of your weight on your hands.
- Push your hips higher up, slowly bringing the heels to the ground and straightening the knees. There should be a full stretch in the legs, the back and the arms. Keep the head between the upper arms.
- Hold for as long as you like. To release, bend the knees and get back on the floor in table top position.
Yoga for Weight Loss
Many people think that weight loss requires lots and lots of cardio, like skipping and running. Few people realize that for sustained weight loss, a holistic approach is required, that tackles everything, from mindset to nutrition to exercise. Yoga increases awareness and mindfulness about your eating habits, and the right poses can fast track your weight loss efforts.
10. Trikonasana (Triangle Pose)
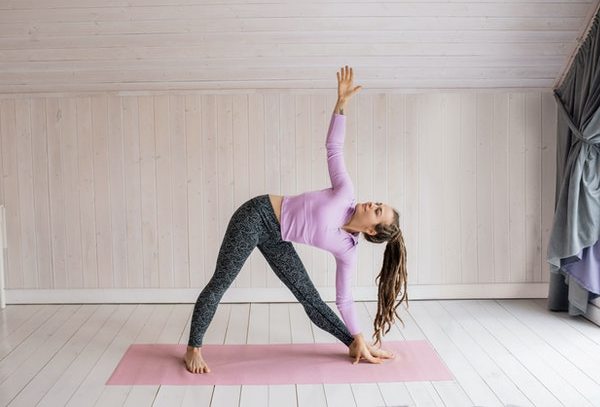
This pose looks like fun, but it gives the body quite a workout, and can be challenging for beginners. The triangle pose stimulates the abdominal organs, improving digestion and boosting metabolism, ensuring you burn more calories.
- Stand in mountain pose and step feet to about 3-4 apart, depending upon your height.
- Keep back straight and shoulders down. Raise arms on either side till parallel to the floor, palms facing down.
- Turn the right foot a full 90 degrees to the right. Turn the left foot inward, about 45 degrees towards the right.
- Align the legs so that the right knee is in line with the right ankle, and the right heel is in line with the left heel.
- From the hip joint, bend the upper body sideways to the right, digging into the left foot.
- Bring the right hand to the ankle, or if you can’t reach the ankle, use a block or rest the hand on the shin.
- Extend the left arm upwards, perpendicular to the floor. Turn the head to look at the left hand.
- Hold the pose for as long as is comfortable. Inhale and come up to standing position. Repeat on the other side.
11. Naukasana (Boat Pose)
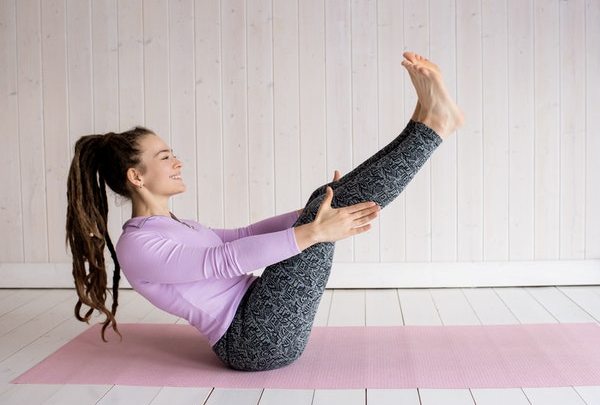
This pose is a proper ab workout and an excellent strengthening exercise. It also boosts digestion and improves metabolism which enables burning more calories even at rest.
- Sit on the floor with legs extended straight out in front. Place hands on the floor on either side of the hips, slightly behind them.
- Put more weight on the hands and lift the chest by leaning back a little. Keep back straight and long. Continue leaning till the bulk of your weight is on your tailbone, supported by the hands.
- Exhaling, bend knees and lift them off the floor, keeping the shins parallel to the floor. Keep back straight as you maintain balance.
- If you can at this point, straighten your knees so the legs are at about 45 degrees to the floor. Extend arms out in front, parallel to the floor.
- Hold the pose for as long as is comfortable, breathing normally. To release, exhale and bring legs to the ground.
12. Surya Namaskar (Sun Salutation)
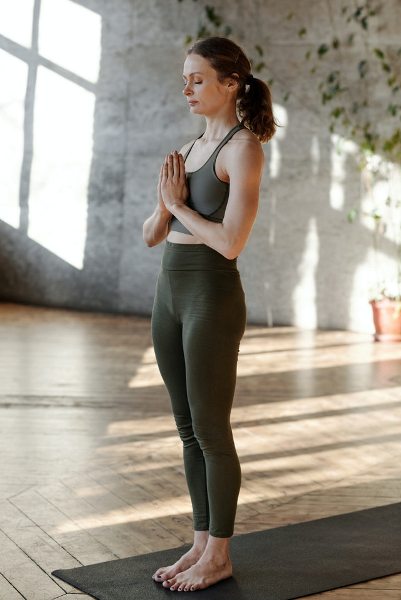
The Surya Namaskar is quite a popular part of yoga practice and with good reason. It’s used as a warm up, a cool down as well as the main practice. It stretches pretty much every part of the body, improving blood flow and toning all the muscles. Done ata faster pace, it also doubles up as a cardio workout. One round of Surya Namaskar is made of two sets, with each set having 12 steps, done on either side.
- Stand at the bottom edge of your mat, so the mat is laid out behind you. Keeping your feet together, stand with back straight. Inhale and lift both arms up. Exhale and bring them to a prayer position in front of your chest.
- Inhaling, lift the arms up, stretching the body completely.
- Exhaling, fold forward into a standing forward bend. Keep hands on the floor on either side of the feet.
- Inhale and push your right foot as far back as you can go, right knee resting on the floor and right toes turned under. Look up, expanding the chest.
- Exhale and bring the left foot back to join the right, so you are in a plank position with the back straight.
- Exhaling, bring the knees to the floor, then the chest and forehead, keeping the hips raised. Elbows are bent.
- Inhale and glide forward so that the upper body is lifted and the hips rest on the floor. Tops of the feet come to rest on the floor. Turn your gaze upward.
- Exhale and putting your weight on your hands, lift the hips to a downward dog pose.
- Inhale and bring the right foot forward to the position in Step 3, in between the hands. The left knee rests on the floor, left toes turned under. Look up, pushing down the hips and expanding the chest.
- Exhale and bring the left foot to join the right, keeping hands on the floor, in a standing forward bend.
- Inhale and roll up, raising the hands and bending backwards with legs straight.
- Exhale and bring the body back to starting position. Repeat on the other side.
Yoga for Better Posture
Moms really suffer when it comes to posture. Being pregnant shifts the center of gravity of the body and alters the way we stand and walk. Then carrying a baby, nursing all day long and then running after little kids – all this takes a toll and results in aches and pains. Yoga can go a long way in fixing posture and getting rid of those niggling pains.
13. Vriksasana (Tree Pose)
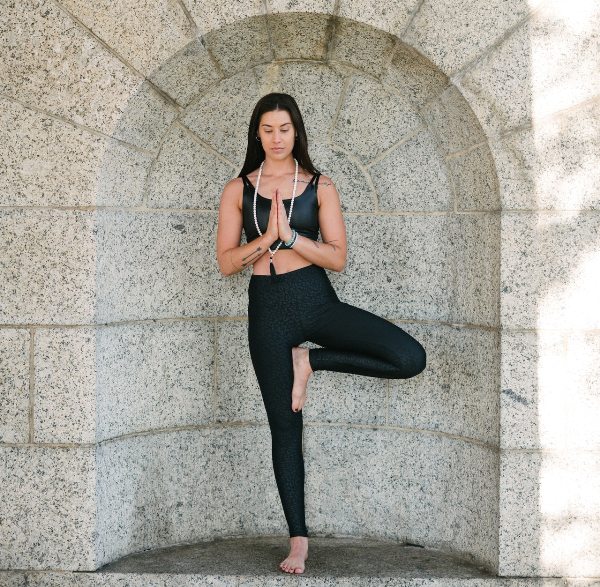
The tree pose is a great way to correct your posture and can be attempted by beginners too, in spite of how hard it looks. Having to balance on one foot instantly makes us stand upright and puts the hips, back and shoulders in their right positions.
- Stand in mountain pose, with back straight, shoulders down, neck and head feeling light. Ground down through your feet.
- Imagine four points at the four corners of each foot and stabilize through these points. Find a spot in the distance to focus your gaze on.
- Place your hands on your hips and bend your right knee, lifting the right foot. Root down through the four corners of the left foot.
- Place the right foot onto the left inner thigh, above the left knee. If this is too hard, place it on the left shin, below the left knee.
- Open out the right knee and thigh as far as you can without turning or twisting your hips.
- Bring your hands into a prayer position in front of your chest. Hold for as long as you can. If this is too hard, do the pose standing against a wall for support. Release and repeat on the other leg.
14. Gomukhasana (Cow Face Pose)
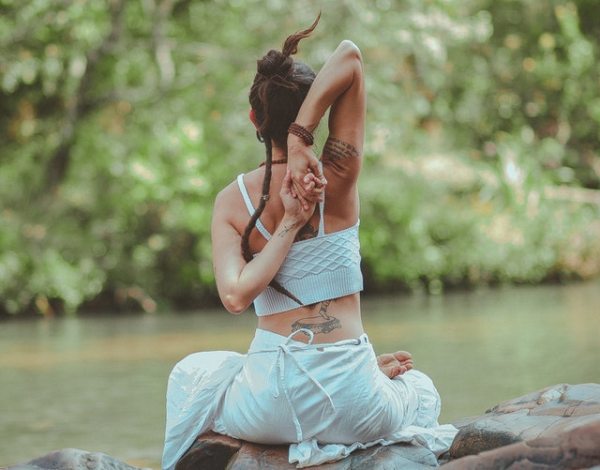
No matter what breastfeeding position you choose, you’re bound to end up slouching at some point or the other. This is particularly true as we spend increasing hours on our phones. Cow face pose is great to stretch out the shoulders, chest, back as well as the lower body. The crossed legs represent the cow’s lips while the arms are the cow’s ears, one up and one down.
- Sit on the floor with legs completely extended out in front of you. Bend knees, placing feet flat on the floor.
- Move the left foot under the right knee and take it to the outside of the right hip.
- Move the right foot over the left knee and take it to the outside of the left hip, so that both knees are on top of each other in one vertical line.
- Inhaling, extend the right arm out to the side and then rotate it inwards. Then bend the right elbow, moving the right hand towards the back. Slowly move the right hand upward to the upper back.
- Inhaling, extend the left arm out to the left side and rotate it outward, so the palm is facing up. Bend the left elbow so it is pointing towards the ceiling and bring the left hand to the middle of the back. Clasp the right hand with the left. Keep the chest open and the shoulder blades drawn back.
- If this is too hard, use a strap to connect the two hands. Hold the pose for as long as you like. To come out of the pose, first release the arms and then the legs. Reverse the arms and legs and repeat.
15. Urdhva Mukha Svanasana (Upward Facing Dog)
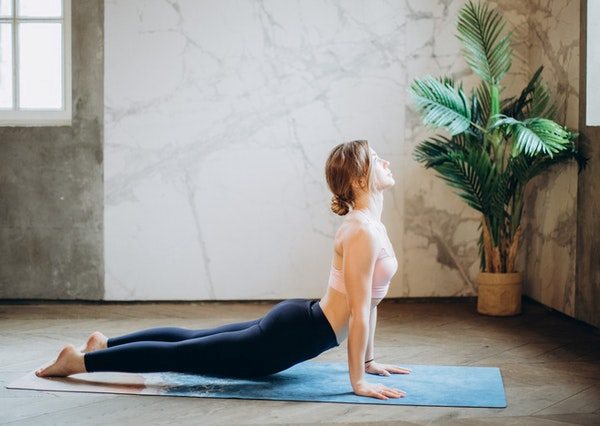
The upward facing dog pose is similar to the cobra pose, but a little more challenging. This is great to strengthen the back and arms, while also ensuring an elegant posture. This pose also helps to make the buttocks nice and firm.
- Lie on your belly on the mat, with legs extended and tops of the feet resting on the floor. With elbows bent, place hands on the floor.
- Bring hands to either side of the waist, and inhaling, press down, pushing the upper body up and straightening the arms.
- Push higher so the torso and thighs are lifted off the floor. Let the inner elbows face forward. Keep the shoulder blades back and open up the chest. Look straight ahead, without straining the neck. Hold for as long as is comfortable.
Yoga for More Strength
Women are strong, and mothers are proof of that! However, we also need to develop physical strength, especially as women are more prone to osteoporosis and bone loss. Strengthening yoga poses help build muscle and endurance and makes the challenges of daily life easier.
16. Eka Pada Adho Mukha Svanasana (Three-Legged Dog Pose)
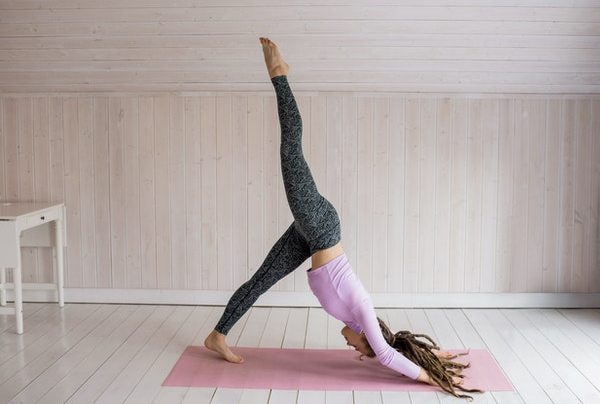
Life isn’t perfect, and we often have to deal with things being out of balance. The three legged dog pose is a perfect representation of how we can stay grounded even through asymmetry and how we can develop the strength to do so.
- Start by getting into a regular downward dog pose, with feet and heels flat on the ground and most of the weight being supported by the hands. Ensure the hips are high in the air and the back and legs are straight.
- Slowly shift the weight of both feet onto the right leg, lifting the left leg from the hip joint. Lengthen the left leg as you lift it all the way up.
- Use your abs to keep the back straight and the pelvis in a neutral position and to avoid collapsing into the right hip.
17. Utkatasana (Chair Pose)
If you spend too much time in a chair and would like to strengthen your legs, the chair pose is perfect for you. Also called the awkward chair pose, it’s relatively simple in theory but does quite a number on your leg muscles.
- Stand straight in mountain pose. Place feet hip width apart.
- Bend your knees and send your hips backward, as if you were going to sit in a chair. Bend as deep as you’d like to go, keeping knees in line with the feet.
- Raise arms overhead, keeping the chest lifted. Let the palms face each other.
- Stay here for as long as is comfortable.
18. Chaturanga Dandasana (Four Limbed Staff Pose)
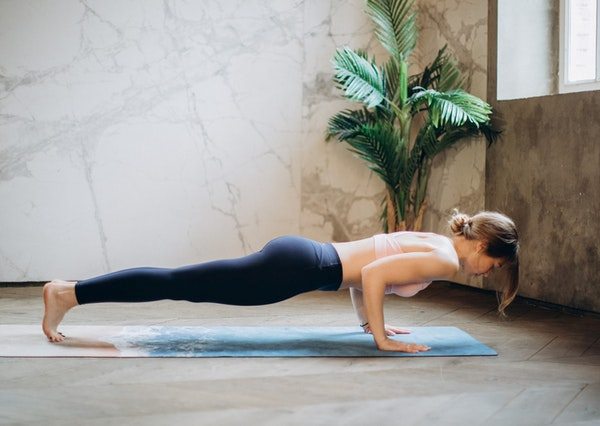
We all know that the plank is one of the main strengthening exercises, but the four limbed staff pose takes it a step further. It’s mid-way between a plank and a push up, and is more beginner-friendly than the latter. It strengthens the arms, shoulders, back and core
- Get into a plank position, weight supported on the hands and the feet, with toes turned under. Maintain a straight line from the crown of the head to the heels. Keep the hands under the shoulders.
- Bend the elbows and lower the chest to the floor, maintaining the straight line in the neck and back. Go down till th shoulders are in line with the elbows. If this is too hard, get down on your knees first.
- Hold for as long as is comfortable, breathing naturally. To release, lift chest and go back to plank position. Repeat for as many times as you like.
Yoga for Destressing
Moms are under stress all of the time! Sometimes it’s because of worry for our family’s wellbeing, sometimes it’s Mom guilt and sometimes it’s plain overthinking. Stress affects both the mind and body, and can derail your health. Try out these yoga poses for complete relaxation at the end of the day or when you’re finding it hard to sleep.
19. Sukhasana (Easy Pose) with Forward Bend
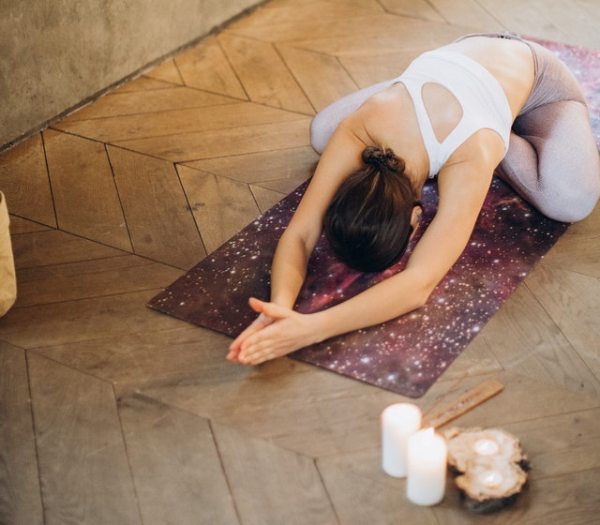
As the name itself suggests, this is an easy, comfortable pose, and the forward bend is an addition that increases its relaxation benefits.
- Sit on the mat with feet extended out in front, and back straight.
- Cross the right leg and left leg over each other, so the knees are directly over the feet.
- Place the palms on the knees, arms extended and back straight. Keep head and neck neutral.
- Bend forward from the hip, as far as you can go. Extend arms out in front. Stay in the pose for as long as you like, and then come back into Sukhasana by rising up.
20. Prasarita Padottanasana (Wide-Legged Standing Forward Bend)
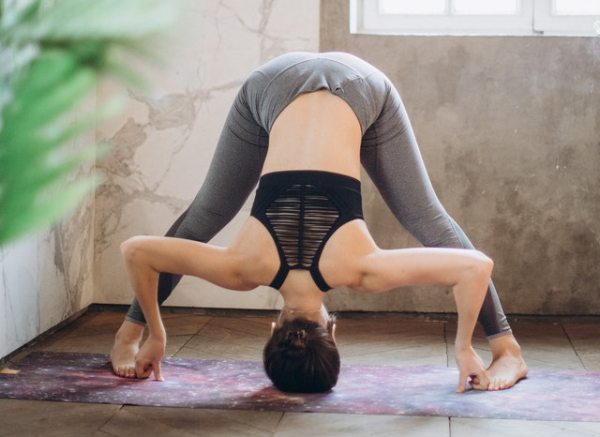
Forward bends have many benefits, primarily of increasing blood supply to the face and the head, but the wide legged forward bend has additional relaxation benefits. It’s advisable to use a yoga block for this pose, especially if you’re a beginner.
- Stand in the middle of the long edge of the mat. Stand in mountain pose, feet firmly grounded and back straight.
- Step both feet out on either side in a wide stance, about 3-4 feet, depending upon your height. Ensure all corners of the feet are grounded into the mat and that the inner edges of both feet are parallel.
- Place hands on hips. Inhale and lift up through the upper body. Keep head and neck neutral.
- Exhaling, fold forward from the hip joint, keeping the back straight. Bend till the upper body is parallel to the floor.
- Extend arms down and touch the floor below the shoulders. Walk fingers so that they are in between the feet.
- Exhaling, lower the upper body completely down, so that the crown of your head rests on the floor. If this is not possible, rest your head on a block. The elbows will bend naturally and weight will fall on the palms.
- Stay here for as long as is comfortable. To come out of the pose, inhale and bring your hands to the hips. Lift the upper body back up and step feet back to the original position.
21. Viparita Karani (Legs Up the Wall Pose)
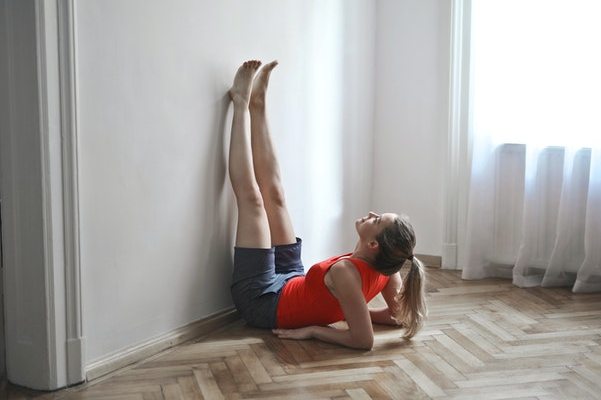
This is the most relaxing pose to do after a hard day or whenever you feel anxious and need to calm down. It takes some effort to get into the pose correctly, but once you’re there, you’ll feel immense relief from whatever is bothering you. Ensure you have a couple of blankets and an empty wall for this pose.
- Sit about 6 inches away from the wall, with your right side against the wall. Exhaling, sweep your legs up on the wall, moving your upper body towards the floor.
- Adjust your position so your buttocks are almost right against the wall. You can place a blanket under the hips at this point. Press your feet into the wall and bending your knees, lift your hips and place the blanket underneath.
- Settle the upper body on the floor, keeping the shoulders down and away from the ears. You can place a rolled up blanket or small pillow under your head and neck if necessary.
- Extend arms out to the sides, palms facing up. Close your eyes and relax for as long as you want.
- To come out of the pose, slide legs off the wall onto the floor and turn to the side. Slowly sit up with an exhalation
While yoga is generally considered safe and with a very low risk of injury, it’s still important to assess your ability and your body’s condition before attempting any pose. This is particularly if you have any issues with your back, neck or hips. If you’re a new Mom, make sure you have the green light from your doctor. This is usually about 6 weeks after a vaginal delivery and 8 weeks after a C-section.
Whatever pose you choose, be sure to go really slow and pay more attention to your breathing than on getting the pose ‘picture-perfect’. Follow your body’s cues and don’t force it into a position you’re not ready for. That’s the great thing about yoga, it makes you aware of your body like nothing else, and you’ll learn to appreciate what a wondrous thing your body is!
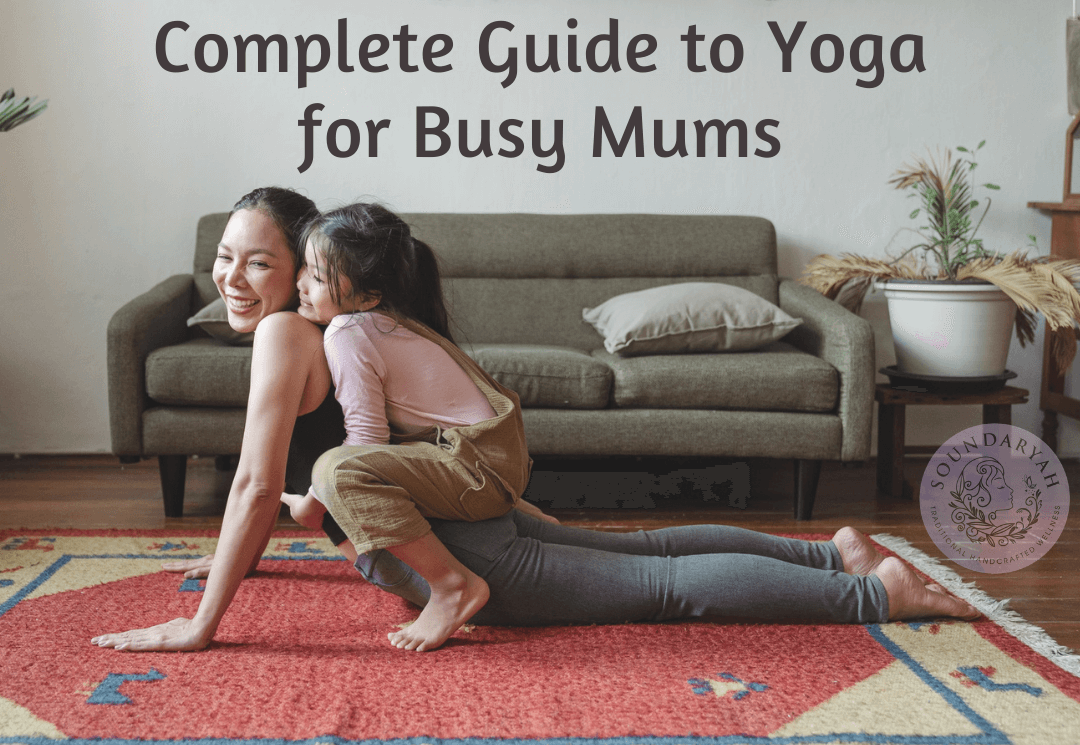
Did you find our “Complete Guide to Yoga for Busy Mums” interesting, please let us know in the comments section.
For more interesting updates do follow us on Facebook and Instagram.


 Verified Purchase


![Youthful Glow Herbal Face Wash [100g] - Soundaryah](http://soundaryah.com/cdn/shop/products/1a_b5d64eda-7417-41b9-bad5-b271f4ef68ff_300x.jpg?v=1634899930)
![Royal Herbal Hair Wash [200g] - Soundaryah](http://soundaryah.com/cdn/shop/products/1_300x.jpg?v=1669120964)
![Intensive Body Polishing Ubtan [200g] - Soundaryah](http://soundaryah.com/cdn/shop/products/1a_8728dcb7-c696-447d-b42e-0a56a5326fb6_300x.jpg?v=1634899848)